

ENTERTAINMENT
Upgrade Your Xbox One With An SSD
Upgrading your Xbox One with an external SSD can massively improve game load times and improve the overall experience when you’re in a game. If you don’t believe us check out these SSD load times on GTA V:
Unfortunately, Microsoft have decided that upgrading the internal hard drive on your Xbox One will ultimately void your warranty. The good news is that you’re easily able to store all your games on an external drive.
At the minute, buying an external SSD will come at a cost see here. So, if you’re attempting to do this on a budget then you’re better off buying the parts separately:
Recommended SSDs:
- Professional: Samsung 512GB 850 Pro
- High-end: Samsung 500GB 850 EVO Series
- Consumer: Sandisk 480GB SSD Plus
Building Your External SSD
To build your external SSD, it really is as simple as:
- Open the hard drive enclosure
- Insert the SSD
- Close hard drive enclosure
- Attach USB 3.0 cable into port
Formatting The SSD
Once you’ve built your external SSD, plug it into the side USB port on your Xbox One.
Although unconfirmed, we’re told that the side port is quicker than the 2 rear ports (although not by much).
Once plugged in, you’ll be greeted by the following screen.
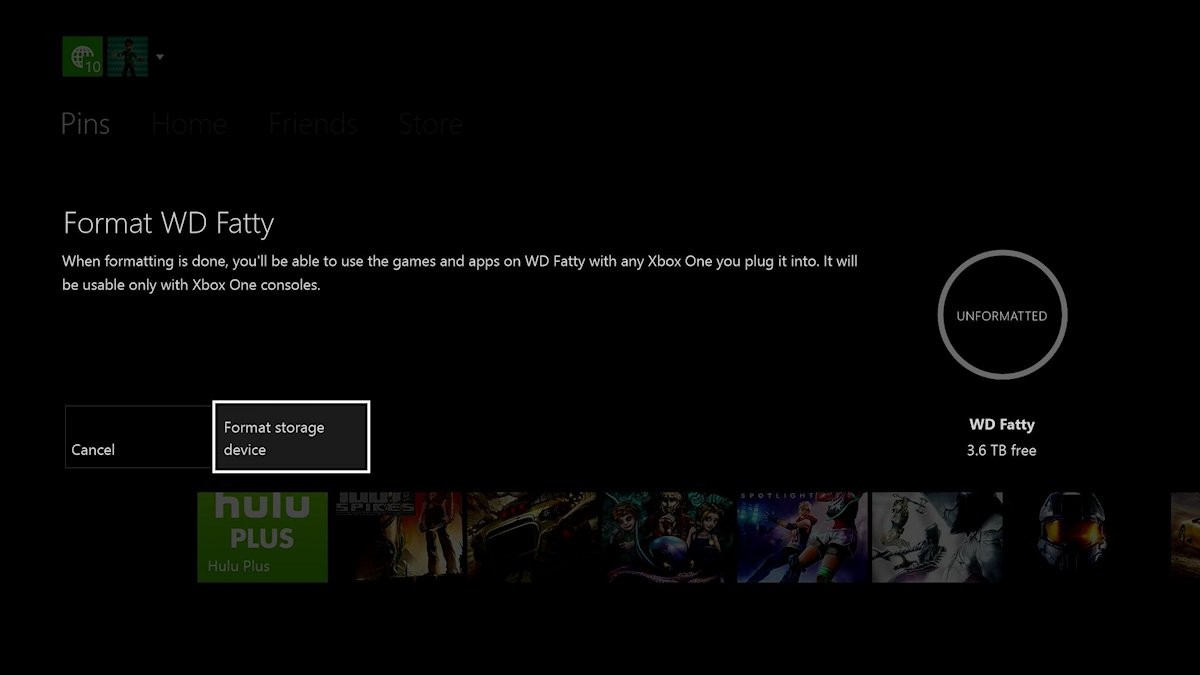
Format External Hard Drive Xbox One
In order to store games on your drive you’ll need to format it. We must point out that once you’ve formatted the drive it can no longer be used for anything else (unless you format it again on your PC).
If you aren’t greeted by the above screen when you plug in your external SSD head to:
Settings > System > Storage > External Drive > Format for games & apps
Your Xbox One will ask you whether you’d like to ‘Install new things here‘ or ‘Keep current location‘. We’d advise that you install new things onto the external drive.
Transferring Games To The External Drive
Unfortunately, there is no way to do this in bulk. You’ll need to transfer each title across individually. Fortunately, USB 3.0 makes this a fairly quick process.
To view all the titles on your internal hard drive follow:
Settings > Storage > Internal > View contents
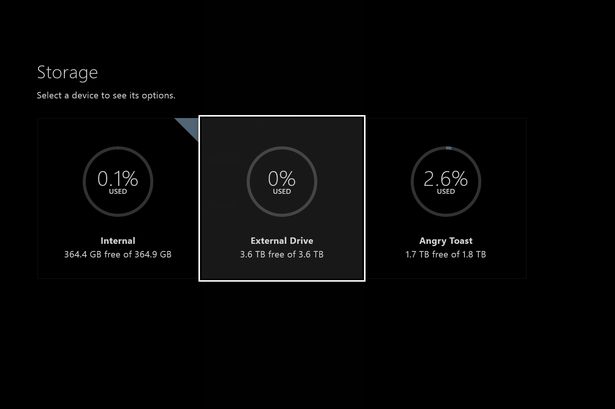
Xbox One Storage Device Menu
Once in this folder, hover over the title you wish to transfer across and press the ‘menu’ button on your controller. You’ll be greeted by a menu:
Manage Game > Move > External > Move

Xbox One Manage Game Menu
Although it depends on the size of the game you’re moving across, it should take a couple minutes to transfer the game to the external drive.
Repeat this step until your games have been moved across to your external drive. If you’re limited on space we’d recommend only moving across the titles that you play regularly.
Accessing Games on External Drive
You can access games on your SSD in the same way you previously accessed games on the internal hard drive.
Head to ‘Games’ and make sure that ‘All’ games are visible rather than ‘Internal’.

‘All’ Game Tab Xbox One
Can I Use a Normal External Hard Disk Drive?
In short, yes.
You will see small performance improvements when using a standard external hard disk, providing that it is USB 3.0.
As well the performance enhancements, gamers will use standard external hard drives as a way of storing more games.
Seagate have released an Xbox One specific external hard drive which gives gamers an additional 2TB of storage on top of the standard 500GB or 1TB internal storage. Plus, it has Xbox branding and looks great.
Click here to take a closer look at the Seagate Game Drive.
Need it in a hurry?
Express delivery available on selected items
Over 10,000 products
The latest technology from the biggest brands
UK customer service
Our people are on hand Mon to Fri 9am - 5pm
Over 25 years of experience
Trusted by customers for over two decades